How To Winterize A House For Mold Prevention
This post may contain affiliate links. Read our full disclosure.
If you live in a cold climate, winterizing a house is probably old hat by now. But are you winterizing a house for mold prevention in addition to general winterization purposes?
Winterization is the process of preparing a home for the harsh conditions of winter. A lot of people have a false sense of security about winter – that mold isn’t likely to grow. This is far from true. Just because mold doesn’t prefer freezing temperatures outside doesn’t mean that it doesn’t flourish in the warmth of your home.
Winterization is usually performed in the fall before snow and excessive cold have arrived. Winterizing your home protects against damage due to bursting water pipes and from heat loss due to openings in the building envelope. It also aids in mold prevention due to leaks, standing water, and faulty seals around the home.
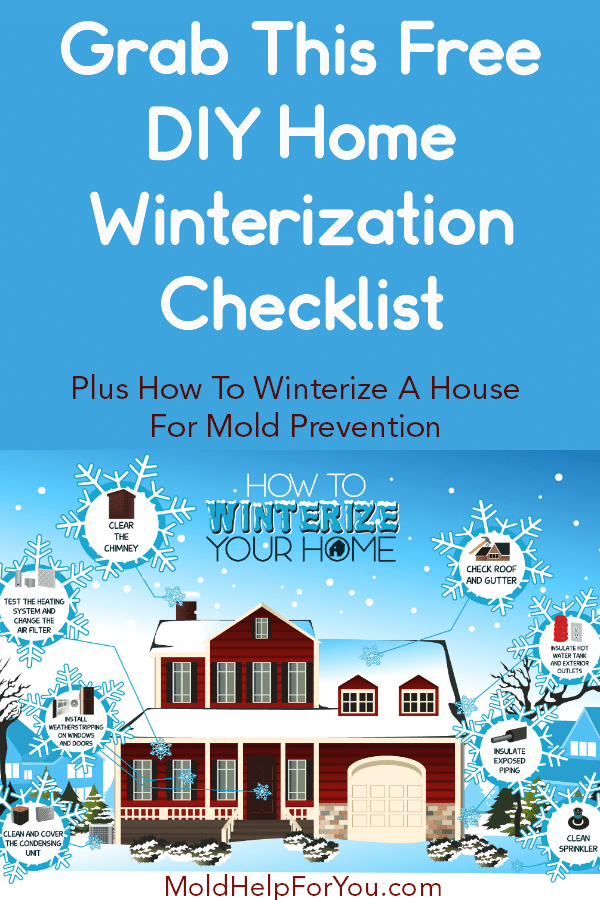
Let’s take a look at how to winterize a house for mold prevention!
Wintering The Plumbing System
Water damage caused by bursting pipes during cold weather can be devastating. A ruptured pipe will release water and not stop until someone shuts off the water. If no one is home to do this, an enormous quantity of water can flood a house and cause thousands of dollars’ worth of damage.
Even during very small ruptures or ruptures that are stopped quickly, water leakage can result in mold and property damage. Broken water pipes can be costly to repair.
To winterize your plumbing, you will need to do the following:
- All exposed water pipes in cold areas, such as attics, garages, and crawlspaces, should be insulated. Foam or fiberglass insulation can be purchased at most hardware stores. Insulation should cover the entirety of a pipe.
- Plastic is more tolerant of cold expansion than copper or steel. Houses in colder climates might benefit from the exclusive use of approved plastic plumbing.
- Cover your water heater with an insulating blanket like this one.
- Water supply for exterior pipes should be shut off from inside the house and then drained.
- Sprinkler systems are particularly vulnerable to cracking due to cold-weather expansion. In addition to turning them, it helps to purge the system of any remaining water with compressed air.
- Homeowners should be aware that much of the plumbing system travels through areas that are significantly colder than the rest of the house. Because it is impossible to monitor the temperature of every portion of the plumbing system, indoor air temperature should be kept high enough throughout the winter to keep pipes in any unheated places from freezing.
- If you are not already using water leak alarms and automatic leak shutoff devices, this is a good time to install them.
Winterizing A Home To Prevent Leaks in the Building Envelope
General Interior
- Feel the wall around electrical outlets, pipes or wires leading to the outside. Seal any gaps or holes you may find.
- Check the duct-work where it is exposed. If your house is pier and beam construction it is likely that all the duct work is under the house. Animal visitors may pull at it, tear it, or loosen it from the registers. You will want to get that replaced.
- Install a dryer vent seal to prevent cold air and condensation from traveling back into your home.
- Keep doors to bedrooms open as well as vents open in unused rooms. Common advice is to close these doors and vents but that restricts air flow which can lead to mold issues when other factors are present.
Windows and Doors
Leaky window frames, door frames, and electrical outlets can allow warm air to escape into the outdoors while bringing cold air into the home. This can cause the HVAC system to work harder as well as increase the humidity level in a home which can result in mold growth. Window mold is sadly very common. In order to winterize a house to prevent mold due to issues with windows and doors, you will want to do the following:
- Feeling for drafts with a hand around doors and windows or watching for horizontal smoke from an incense stick are a few easy ways to inspect for air leaks. They can easily be repaired with mold resistant caulk.
- On a breezy day, a homeowner can walk through the house and find far more leaks than they knew existed. Leaks are most likely in areas where a seam exists between two or more building materials. Just place your hand there and see if you feel the breeze coming in.
- Replace or install weather stripping under entry doors and around windows.
- If your home has a sliding glass door, check the seal on the bottom to make sure it isn’t letting in cold air and moisture.
- Add a door sweep to each exterior door.
- Uncover and leave curtains open on all south-facing windows to let all possible sunlight in your home. Mold prefers darkness.
Insulation
- Because hot air rises into the attic, a disproportionately larger amount of heat is lost there than in other parts of the house. Like a winter hat that keeps a head warm, adequate attic insulation will prevent warm indoor air from escaping. Attic insulation should be a minimum of 12 inches thick in cold climates. Make sure you are using mold resistant insulation if at all possible.
- Storm doors and windows should be installed to insulate the house and protect against bad weather and potential leaks.
Heating Systems
The heating system is used most during the winter so it’s a good idea to make sure that it works before it’s needed. The following inspection and maintenance tips can be of some help to homeowners:
- Test the furnace by raising the temperature on the thermostat. If it does not respond to the adjustment quickly it might be broken.
- Replace the air filter if it’s dirty. I happen to love the Colorfil filters as they change color when it is time to change them.
- If the furnace is equipped with an oil or propane tank, the tank should be full.
- Check to make sure the blower system is working properly.
- Raise the air temperature in your home so moisture doesn’t end up on surfaces as condensation.
- Move furniture off your vents.
Cooling Systems
- Use a hose to remove leaves and other debris from the outdoor condensing unit, if the home is equipped with one. Protect the unit with a breathable waterproof cover to prevent rusting and freezing of its components.
- Drain any pipes or hoses coming from your air conditioner. You don’t want them freezing during the winter months.
- Vacuum out any pools of water you have in the A/C’s drain pan.
- Remove and store window air conditioners when they are no longer needed. Cold air can damage their components and enter the house through openings between the air conditioner and the windowpane.
- Ceiling fans can be reversed in order to warm air trapped beneath the ceiling to recirculate. A fan has been reversed if it spins clockwise.
Chimneys and Fireplaces
I have an entire article on fireplace mold but some takeaways are:
- The chimney should be inspected for nesting animals trying to escape the cold. Squirrels and raccoons have been known to enter chimneys for this reason. This doesn’t do much for mold prevention but no one wants to roast a critter.
- The damper should open and close with ease. Smoke should rise up the chimney when the damper is open. If it doesn’t, this means that there is an obstruction in the chimney that must be cleared before the fireplace can be used.
- A chimney-cleaning service professional should clean the chimney if it has not been cleaned for several years.
- The damper should be closed when the fireplace is not in use. An open damper might not be as obvious to the homeowner as an open window, but it can allow a significant amount of warm air to escape and can allow moisture in.
- Glass doors can be installed in fireplaces and wood stoves to provide an extra layer of insulation.
Winterizing The Exterior Of A Home To Prevent Leaks And Mold
General Exterior
- Look for gaps and holes in the exterior house wall, especially around pipes and wire. This is an open door to water intrusion. If you find a gap or hole, fill it with expanding foam insulation or caulk. Just make sure that the area is dry. You don’t want to trap moisture inside.
- If you own a brick or block home, check the mortar. It may need repair.
- Do a complete inspection of your exterior sides of your windows.
- If you have a basement with windows, check all the window wells. Remove debris and ensure the window is sealed properly so that no moisture can leach in and condensation cannot build up.
- If you use fire wood for anything keep it separated from the house by at least 20 or 30 feet and covered with a plastic tarp or other moisture barrier. Mold will grow in these wood piles and if the wood is right up against the house, it certainly will try to find a way in.
- Inspect outbuildings and areas such as sheds and cellars or crawlspaces. Look for areas where water intrusion is possible. If you store personal belongings in these areas, make sure they are in plastic storage containers or steel/metal boxes. While not full proof, they do offer a decent level of protection against invasive mold spores. You would not want to bring these into your home.
- Shovel snow away from your home. Don’t let it build up against your house.
Roofs
- If debris is left in gutters, it can get wet and freeze, permitting the formation of ice dams that prevent water from draining. This added weight has the potential to cause damage to gutters. Also, trapped water in the gutter can enter the house and lead to the growth of mold. For these reasons, leaves, pine needles, and all other debris must be cleared from gutters. This can be done by hand or with a hose.
- Missing shingles should be replaced.
- Check any roof penetrations and make sure they are properly sealed. This keeps water out of the home and also keeps heat in. Heat that escapes from the roof can melt ice damns which can then push water into your home.
Landscape
- Rake away leaves and rotting vegetation from your house foundation. Mold thrives in these areas and you don’t want them right up against your home.
- Patio furniture should be covered.
- If there is a deck, it might need an extra coat of sealer.
- If you have any tree branches hanging near your roof, windows, or driveways, trim them back. Snow and ice will weigh them down and possibly cause them to break. This could damage your home by breaking a window, caving a portion of your roof in, and more.
Adequate winterization is especially crucial for homes that are left unoccupied during the winter. Such homes must be winterized in order to prevent catastrophic building damage.
In addition to the information above, the following measures must be taken to winterize an unoccupied home for the winter:
- Winterize toilets by emptying them completely. Antifreeze can be poured into toilets and other plumbing fixtures.
- Winterize faucets by opening them and leaving them open.
- Water tanks and pumps need to be drained completely. This includes the water heater and water softener system.
- Drain all water from indoor and outdoor plumbing.
- Unplug all non-essential electrical appliances, especially the refrigerator. If no electrical appliances are needed, electricity can be shut off at the main breaker.
- Shut off the gas.
My house is winterized. Now what? Do I have to dewinterize it and how?
If your house was winterized by a professional, it is a good idea to call the same company or person back out to dewinterize it. After all, they know what they did and how to undo it.
If you winterized your home yourself, basically just go back through your checklist and reverse all the winterization steps you took. In short, you will want to:
- Turn on all electrical circuits that were shut off
- Connect all water supply lines and pipes that were disconnected
- Turn the water supply back on (make sure only open it half way – there is another step coming before you open it all the way)
- Open the water heater / boil and water softener supply valves
- Turn on the plumbing fixtures one by one (make sure to open any individual shut off valves first). Make sure each one is operating properly before turning on the next one. It is a good idea to run each one for 5 minutes or until the water runs clear and cool.
- Flush all the toilets 3 times
- Check exterior hose spigot connections and faucets
- Check irrigation lines
- Double check all plumbing fixtures
- Open the main water valve all the way
- Plug in appliances, lamps, etc…
- Turn on the gas and light any pilot lights
- Check the sump pump in the basement if applicable
- Reset your clocks and thermostats
- Clear out the roof gutters and drain spouts
And there you have it! All the steps you will need to take to winterize a house to prevent mold! Yes, it is a bit time consuming but block off a weekend and just get it done. It could save you tens of thousands of dollars in mold remediation and other repairs.
Parts of this article were used with permission from InterNACHI.