How To Properly Set Up Mold Containment Before DIY Mold Remediation
This post may contain affiliate links. Read our full disclosure.
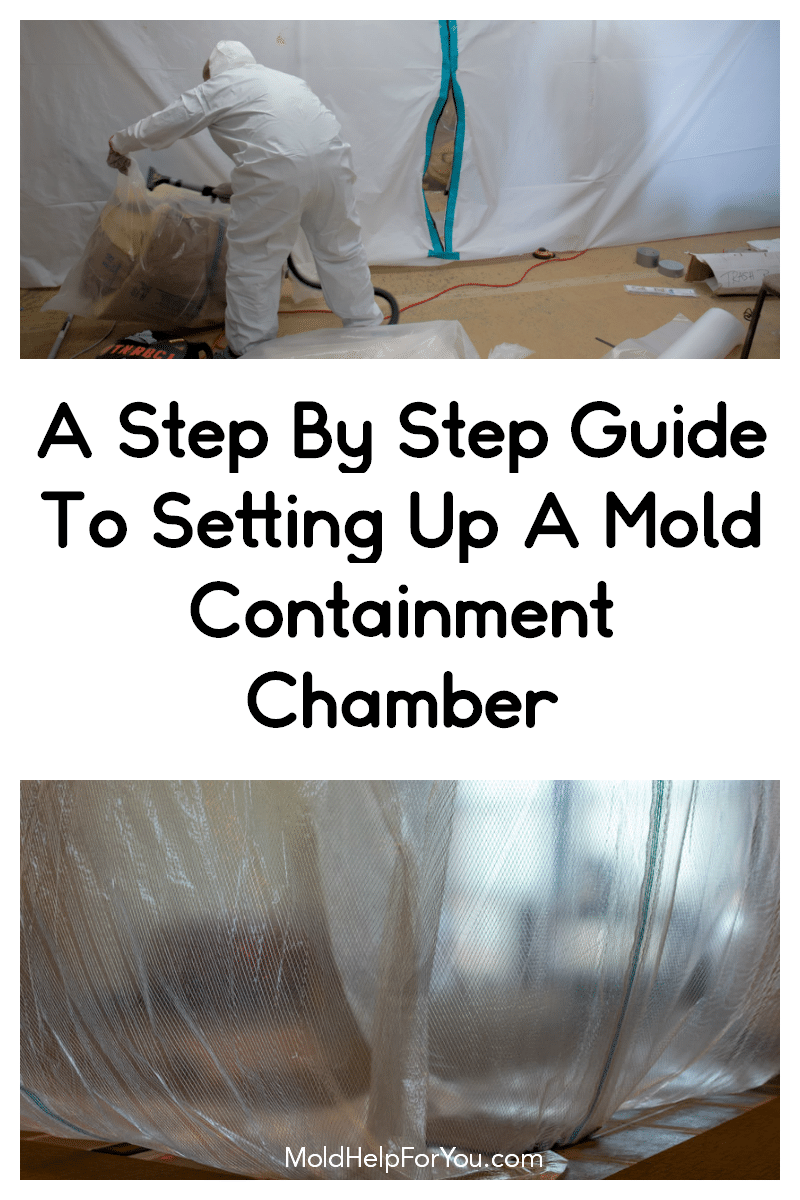
Mold containment is arguably one of the most important steps in the mold remediation process. Isolating the work area to prevent cross-contamination of clean, unaffected areas of the home is imperative. Containment ensures that any mold in the area being remediated does not spread into other areas of the home when it becomes airborne. And it WILL become airborne.
Containment chambers also make the clean-up process easier by keeping any dust and other debris within the confines of the work area.
While I do not recommend DIY mold remediation, I know that there are a lot of people out there doing it. I also know that there are a lot of people out there who do NOT properly contain the area. I get a lot of calls from people wanting to know “how badly” they contaminated the rest of the house because when they went to remove the moldy materials in their home, they found a larger issue than they expected.
No matter how small the area you are remediating, you should always create a mold containment chamber. There are no shortcuts here either. It must be done correctly.
Below is a step by step guide on how to properly set up mold containment before DIY mold remediation. I cover equipment and supplies needed as well as some other important information so please read this entire article so you are armed with ALL the information you will need before starting your remediation project.
If you decide that DIY mold remediation isn’t for you, please read my article on how to choose a remediation company.
Equipment and Supplies Needed To Create A Mold Containment Chamber
- 6 mil Polyurethane sheeting (this is a good price)
- Painter’s Tape (like this or this for textured surfaces)
- Duct Tape (only use this kind to avoid sticky residue)
- Zipwall Zippers (like this) or a ZipDoor (this is a good one)
- HEPA filtered negative air machine (air scrubber). I prefer this one for DIY mold remediation.
- A good utility knife (I have this one and love it)
- These specialized 4 mil garbage bags
A Step By Step Guide On How To Properly Set Up Mold Containment Before DIY Mold Remediation
Step 1
Evaluate the area. As you prepare to contain the area, be sure you have enough space to work INSIDE the containment area, bag materials you are removing, and run the necessary equipment (such as air scrubbers or tools). The last thing you want is to be squished in the space. On the flip side, don’t make the area too big.
Step 2
Install a HEPA filtered negative air machine (air scrubber) in the area that will be contained.
A negative air machine is a fan which pulls air from the affected area and exhausts the contaminated air outside of the structure via flexible tubing or ducting that goes out a window. Doing this will begin to draw the airborne mold spores away from the airspace, eventually creating a negative pressure environment.
The importance of doing this is so any mold spores that become airborne through the remediation efforts are being controlled, preventing them from affecting the adjacent spaces and flushing them away from the indoor environment.
Follow the instructions that come with the air scrubber you selected. This is the one I highly recommend for DIY remediation.
Do NOT turn the air scrubber on until you have fully contained the area.
Step 3
Using 6 ply polyurethane sheeting (10 ply is fine too) and painters’ tape or duct tape, cover ALL openings inside the area to be contained. This includes:
- Windows
- Doorways
- Corridor entrances
- Air vents
- Drains
- Ducts
- Skylights
- Electrical outlets
- Light fixtures
- Exhaust fans
- All cabinets, shelving, etc. that have cracks and holes
The polyurethane sheeting should extend 2 inches around the outside edges of the openings you are covering. The tape should form a tight seal between the polyurethane sheeting and the material it is attached to.
Step 4
Install the 6 ply polyurethane sheeting to enclose the containment area. The main goal when creating this physical barrier is to completely isolate the work area from any adjacent, non-affected areas.
For a small area, the polyethylene sheeting can be affixed the floor and ceiling. Where the edge of the containment goes, put down two layers of painter’s tape. Then place the edge of the poly sheeting on top of the tape. Then using duct tape, tape the plastic to the painters’ tape. Staples can be added for additional security.
For larger areas, a steel or wood stud frame will need to be put up and the polyethylene sheeting connected to it. Alternatively, poles with grip disks can be installed on the floor and ceiling to provide stability to the containment barrier.
Step 5
Decide where your entrance/exit to the containment area will be. Ideally you want it as close to the path out of your home so you do not have to haul the moldy materials farther than necessary.
Step 6
Install zipper tape where you want the entrance/exit to be. Once you open the zipper it will rip the polyurethane in a perfect line so you can enter and exit the containment barrier easily. You can also use a ZipDoor if you are utilizing a doorway for your entrance/exit.
Step 7
Create a containment hallway. Tape polyurethane sheeting to the floor, walls and ceiling from the entrance/exit of the containment area all the way down the path out of your home. This will catch any debris you inadvertently carry out of the containment area.
Step 8
Turn on the negative air machine. If the containment is working, the polyethylene sheeting should billow inwards on all surfaces. If it flutters or billows outward, containment has been lost, and you should find and correct the problem before beginning remediation.
What Happens If You Do Not Properly Contain The Area Before Mold Remediation?
If mold remediation containment is not adequate, you run the risk of contaminating other areas of the home or the entire home. As soon as the mold remediation begins, spores quickly become airborne. If you do not properly isolate the work areas and contain the moldy areas, airborne mold spores can spread and lead to cross contamination that will require additional cleanup and expenses.
Lack of proper containment can result in additional damage and expensive repairs. Not only could this cause more issues for the home, but it will also be more costly in the long run.
Personal Protective Equipment Needed
Containment of the area isn’t the only important protective measure taken during mold remediation. Personal Protective Equipment should always be worn to keep you safe in the contaminated environment. You will need:
- Respirator
- Goggles
- Gloves
- Protective clothing like a Tyvek suit
- Shoe booties (if not built into protective clothing)
When it comes to mold removal you must do it right the first time! Don’t cut corners. Don’t skip steps. It will only lead to more several problems down the road.
Remember, mold prevention is key! Check out these 27 tips to prevent mold so you don’t find yourself setting up mold containment in the future.

Thanks for pointing out that I will want to check things like the air vents and electrical outlets for signs of mold. That is great for me to know as a new homeowner. I don’t want to get sick because of unseen mold. So, it might be best for me to get a professional to inspect my house for signs of mold.
Hi. We found we have moisture in a corner of our basement and there is some black mold on the cement block wall near the floor; and it looks like a light discoloration of mildew or something on the walls nearby. My problem is my basement is full of bins and boxes and also a large table with items to be sorted all over it. I could not get to it for the past year. Can I first do a fogger of some type to kill surface mold before I have to touch the objects, or do I have to handle them before I do anything which also makes me nervous. I have read lots on your site but have to read so much more. We were all set to use a cold fogger until I read your articles. Now maybe not. I don’t know where to start. I know we have to fix the damp area but will someone even touch it with mold on it? I did do an initial spray of concrobium on that area.
Hi Judy! I would do one of two things first – either a Chlorine Dioxide mold bomb or thermal fogging. Here are a couple of links:
https://bit.ly/3ML3VyK – this is the company I use for the Chlorine Dioxide bombs.
https://biobalancenow.com/?wpam_id=1 – take a look at the HavenFog mini kit.
Either of these approaches would work great! Please reach out if you have additional questions about either of these after taking a look at their websites.